Setup SCSI2SD as the disk drive for a 68k Mac
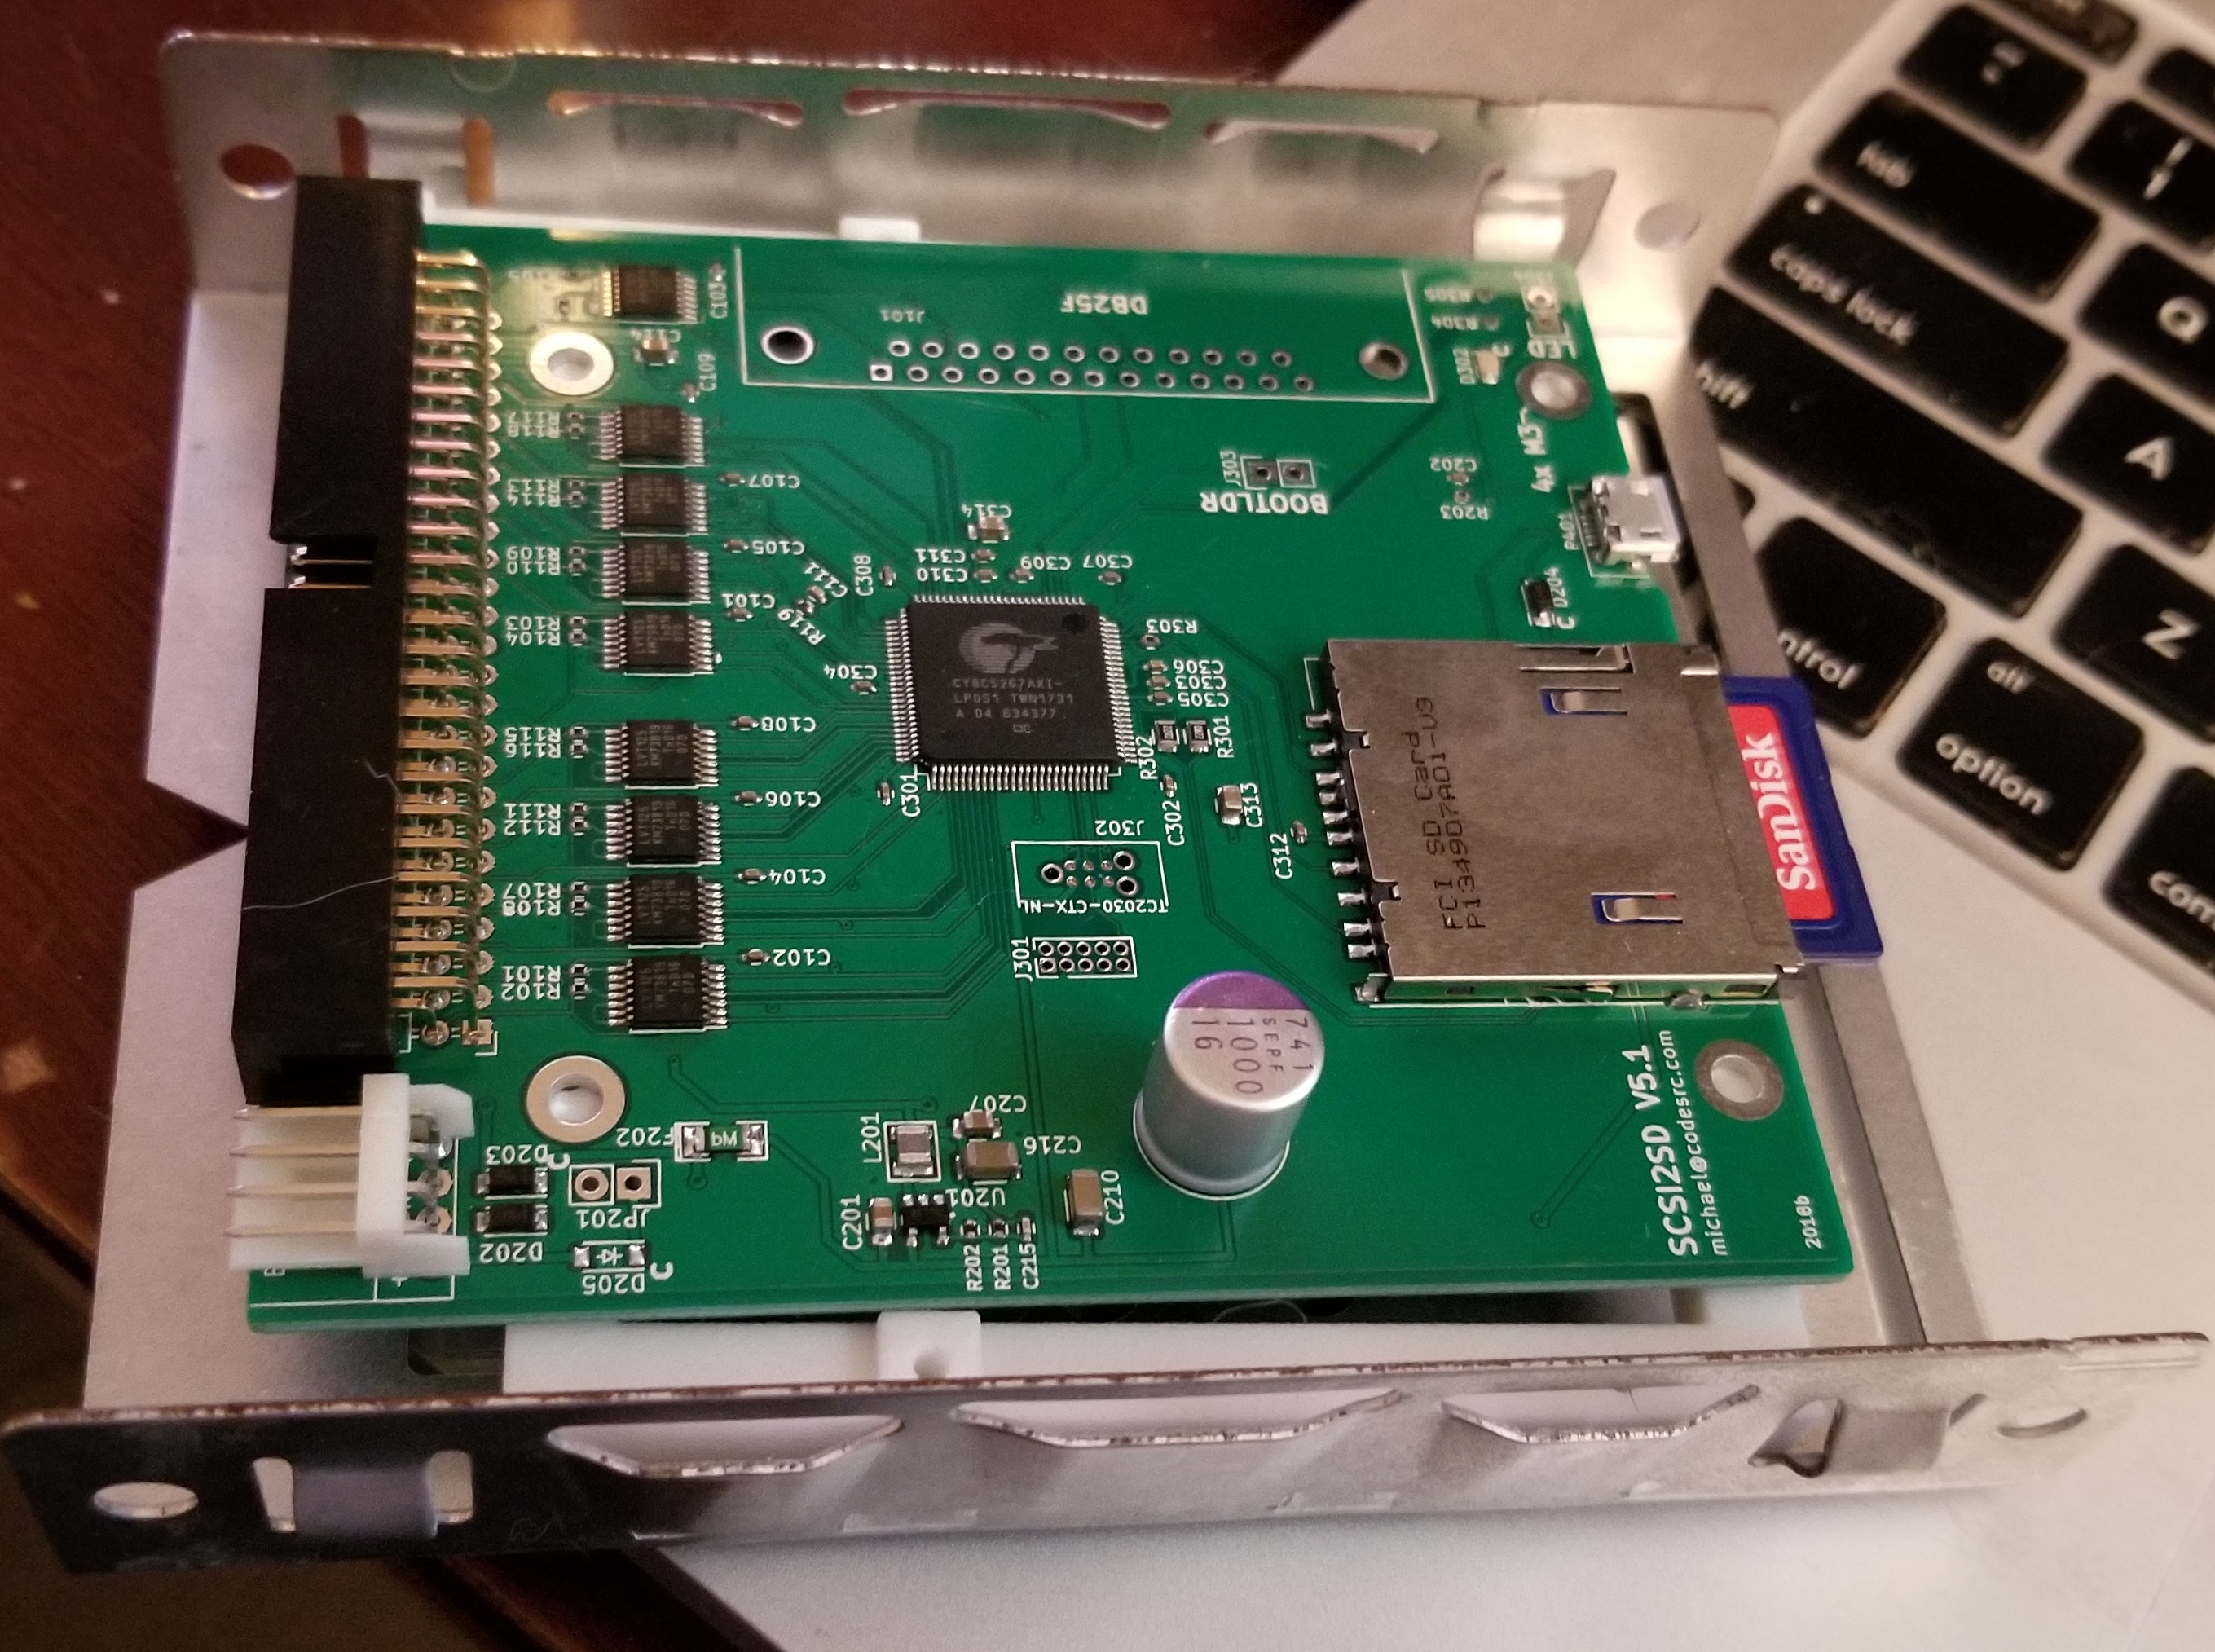
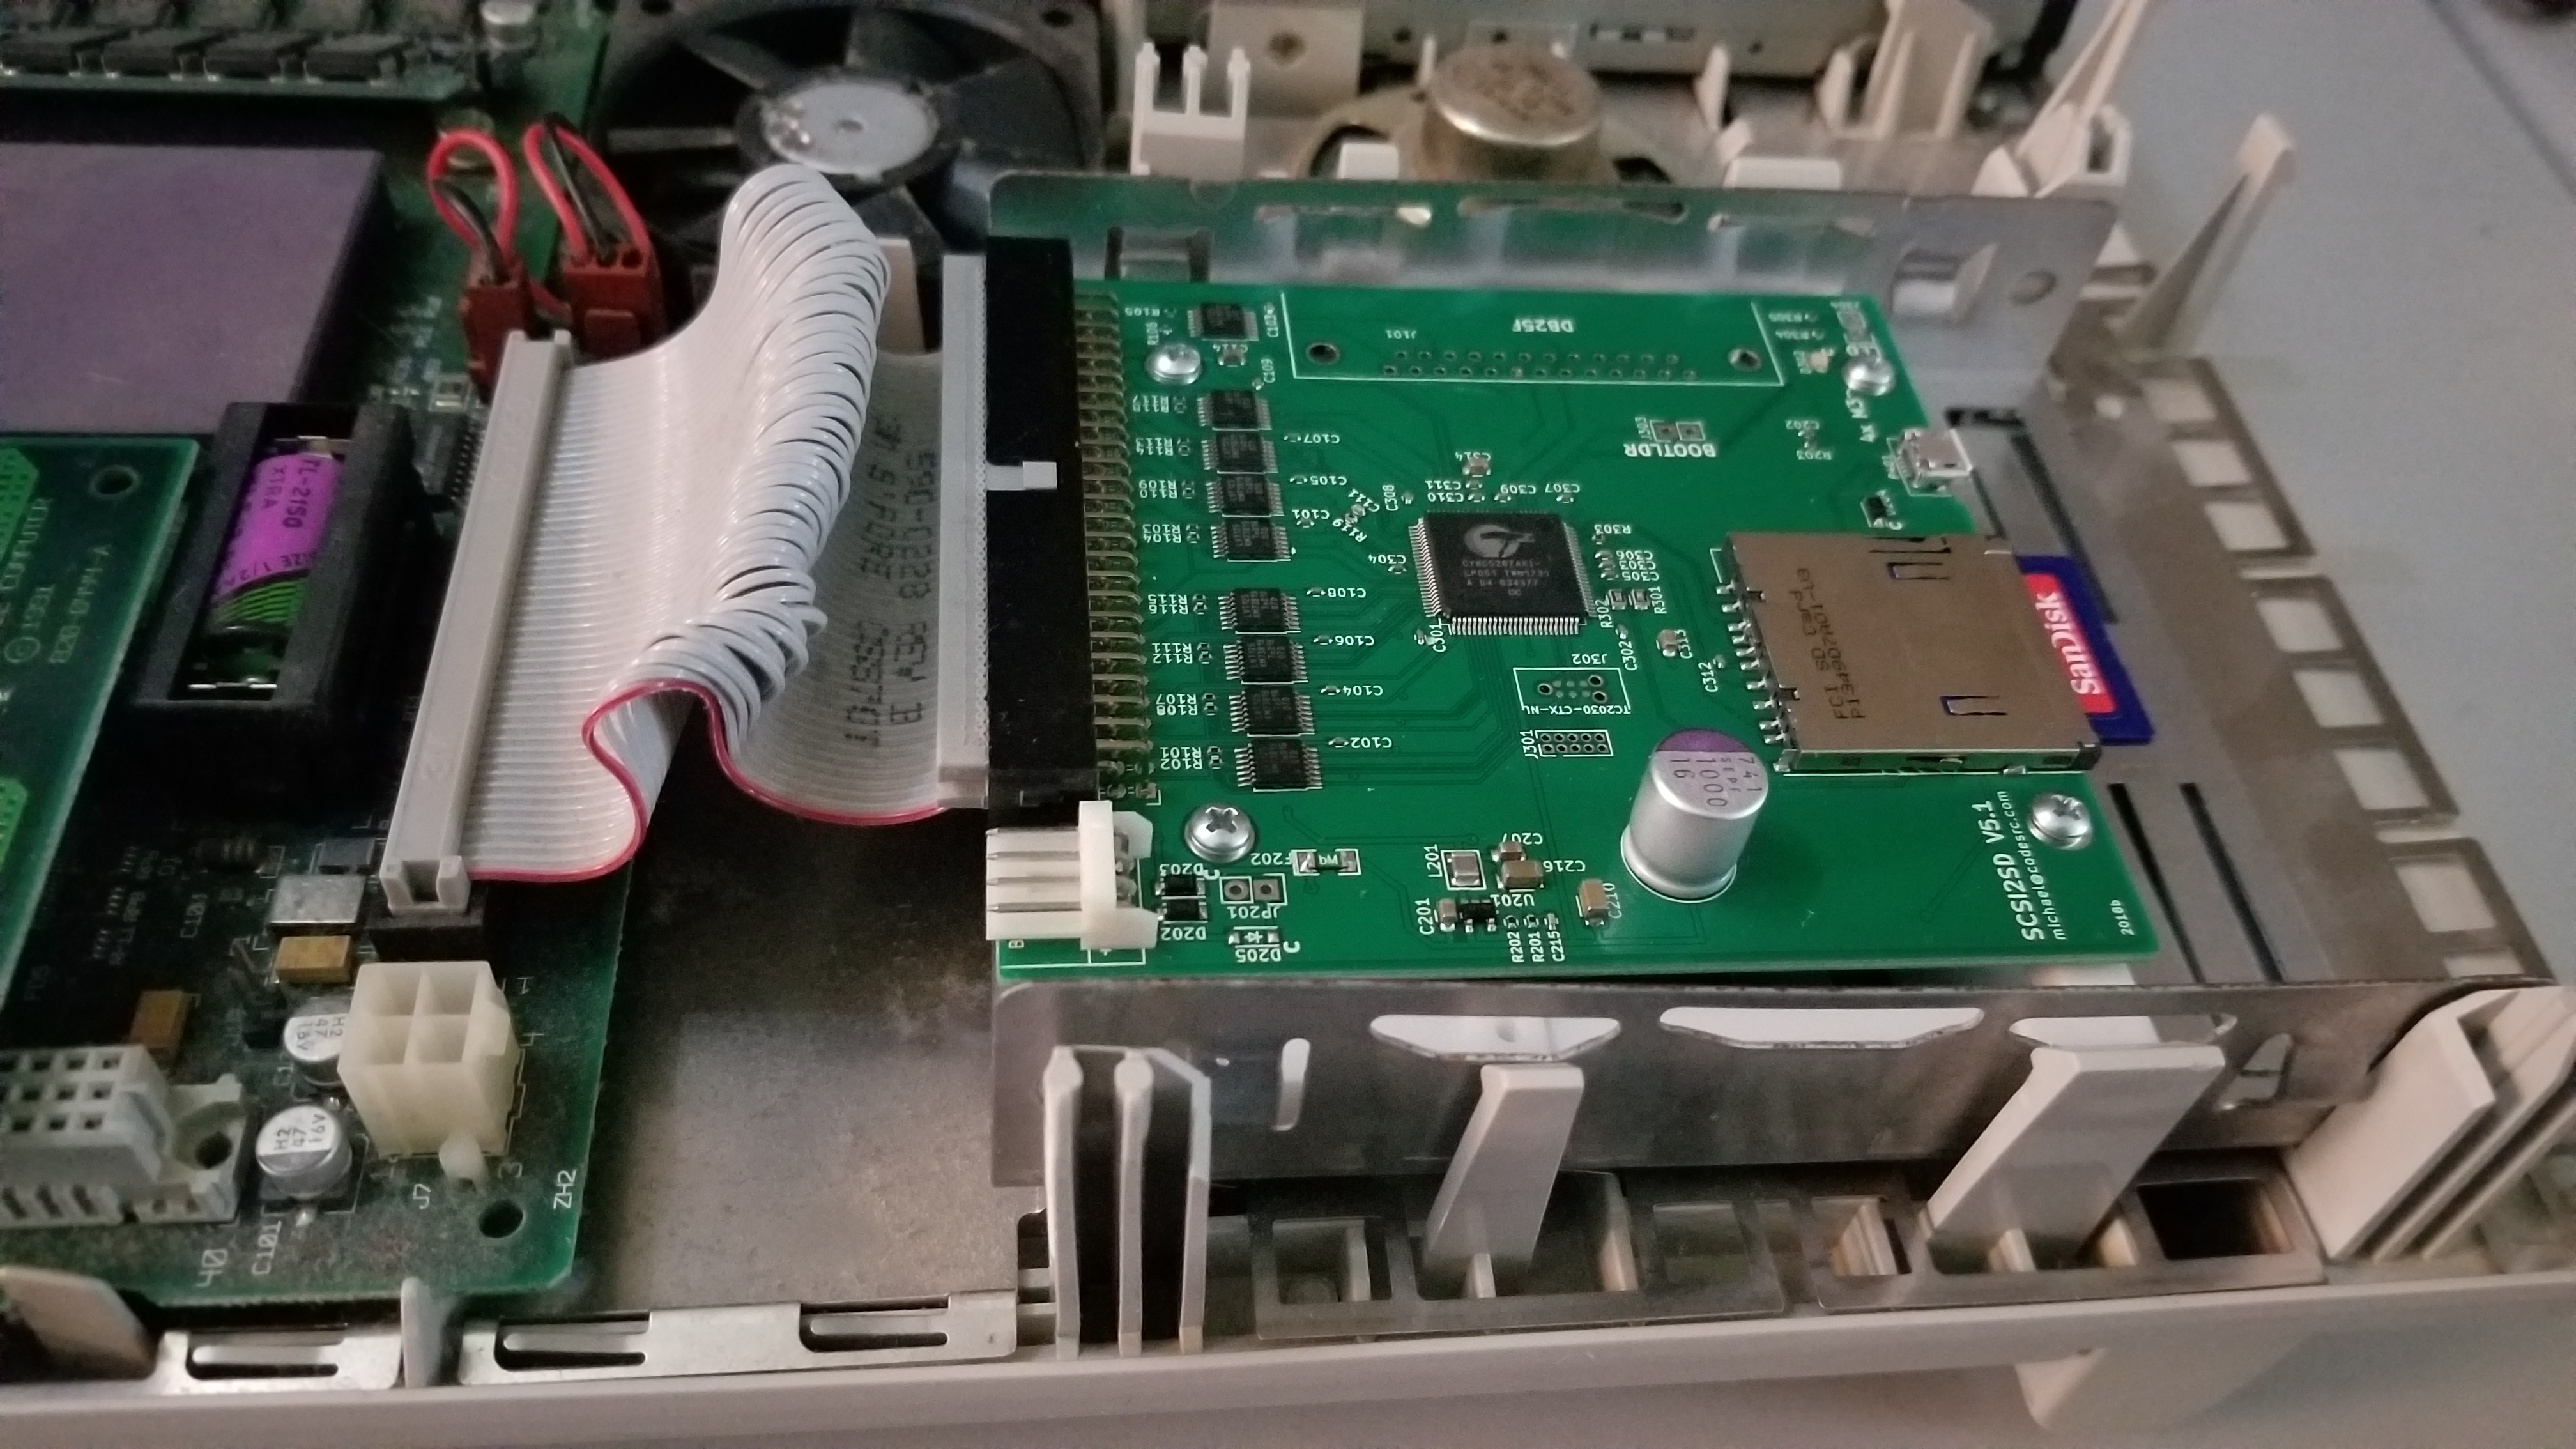
Purchase a SCSI2SD
- v5.1 is recommended for 68k Macintoshes.
- v6 is recommended for PowerMacintoshes.
- The CodeSrc website offers a list of official vendors
- Interial Computing is the vendor in the USA. They also sell the cards on eBay.
Download the SCSI2SD-UTIL software
wget http://www.codesrc.com/files/scsi2sd/latest/linux/scsi2sd-util
wget http://www.codesrc.com/files/scsi2sd/latest/linux/scsi2sd-monitor
Set permissions on the hidraw devices
cat << EOF > /etc/udev/rules.d/99-hidraw-permissions.rules
KERNEL=="hidraw*", SUBSYSTEM=="hidraw", MODE="0666", GROUP="plugdev"
EOF
Startup SCSI2SD-UTIL
- In one terminal window, launch scsi2sd-monitor
- In a second terminal window, launch scsi2sd-util
Connect the SCSI2SD to a modern computer using a USB cable.
Configure the SCSI2SD
-
I was NOT able to update the firmware from Linux. I had to attach the SCSI2SD v5.1 board to my Macbook Air to update the firmware.
-
However, I was unable to configure the SCSI2SD v5.1 board using the Macbook. I had to attached the board to my Linux desktop to configure the device.
-
SCSI2SD ID to 0 (so it works as the main startup disk)
- The Apple SC HD setup software needs to believe that the SCSI2SD is a valid Apple supported hard drive.
- Set the vendor to the string “QUANTUM”
- Set the product ID to the string “FIREBALLX”, where X is a number between 1 and 9. Set the revision to the string “1.0 “ (with a space after, for a total of 4 characters)
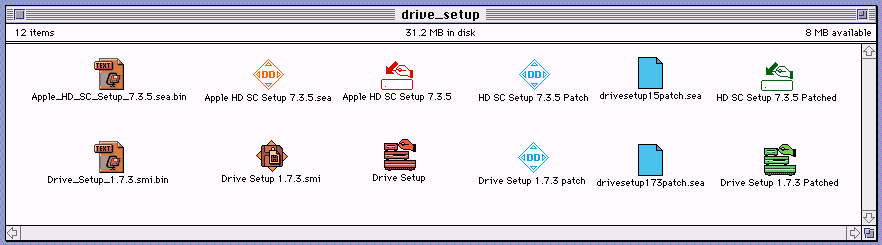
Initialize the SCSI2SD virtual SCSI disks
- The SCSI2SD virtual SCSI disks must have valid Apple Partition Maps
- The Apple disk utilities expect an officially supported SCSI disk.
- HD SC Setup 7.3.5 and Drive Setup 1.7.3 need to be patched to support other disk types than the ones available for the original Macs.
Prepare the BMOW Floppy Emu with the Mac68k firmware
-
Use the BMOW Floppy Emu to install the MacOS on to the SCSI2SD disk.
-
The BMOW Floppy Emu comes with firmware for the Apple II by default. To use the floppy emu with the Mac 68k, the Mac firmware must be applied.
- Download the Mac Firmware
- Copy the femu.bin and firmware.xvf to the BMOW SD card root level.
wget https://www.bigmessowires.com/hd20-0.7H-F14.5.zip
unzip hd20-0.7H-F14.5.zip
cp hd20-0.7H-F14.5/{femu.bin,firmware.xvf} /Volumes/BMOW/- Connect the BMOW Floppy Emu
-
Power on the computer
- PART 1 (CPLD firmware)
- Hold down the NEXT and PREV buttons as the BMOW Floppy Emu powers up.
- Press and release the RESET button.
- Continue holding NEXT and PREV until the firmware update process begins (about 3 seconds).
- Wait 10-15 seconds for the process to complete. Status LED will be flashing.
- When finished, the LCD will display “RESULT: SUCCESS”
- PART 2 (AVR microcontroller firmware)
- Hold down the SELECT and PREV buttons. Note these are not the same buttons as for part 1.
- Press and release the RESET button.
- Continue holding SELECT and PREV until the firmware update process begins (about 1 second).
- Wait 5 seconds for the process to complete. Status LED will be flashing.
- When finished, the LCD will display self-test information, and the main menu.
How to setup SCSI2SD with other vendors and products recognised by Drive Setup.
Drive Setup 1.5 recognized SCSI drives
- I have achieved success with the QUANTUM FIREBALL drives.
- Set the Vendor ID to be QUANTUM and each product to be FIREBALL# where the # is unique.
- In my case I had 4 virtual drives setup on my SCSI2SD so I made each one have the product id’s:
- FIREBALL1
- FIREBALL2
- FIREBALL3
- FIREBALL4
- Unpatched, Drive Setup should recognize the following drive types:
| vendor_id | product_id |
|---|---|
QUANTUM | FIREBALL* |
QUANTUM | * |
CONNER | * |
IBM OEM | * |
SEAGATE | ST225N |
SEAGATE | ST250N |
SEAGATE | ST157NB |
SEAGATE | ST19171W |
SEAGATE | * |
CDC | * |
SEAGATE | ST410800N |
AVID | ST410800N |
MICROP | * |
DEC | * |
SYQUEST | SQ55# |
SYQUEST | SQ511# |
SYQUEST | SQ310# |
SYQUEST | SQ3270# |
SyQuest | SQ5200# |
SYQUEST | EZ135# |
IOMEGA | BETA90 |
IOMEGA | BETA150 |
IOMEGA | BETA230 |
FUJITSU | M2511A |
FUJITSU | M2512A |
SONY | SMO-C5# |
SONY | SMO-C3# |
SONY | SMO-F331-00 |
RICOH | RO-506# |
MOST | RMD-5200# |
MOST | RMD-51# |
SHARP | JY750# |
SHARP | JY800# |
RICOH | RO-301# |
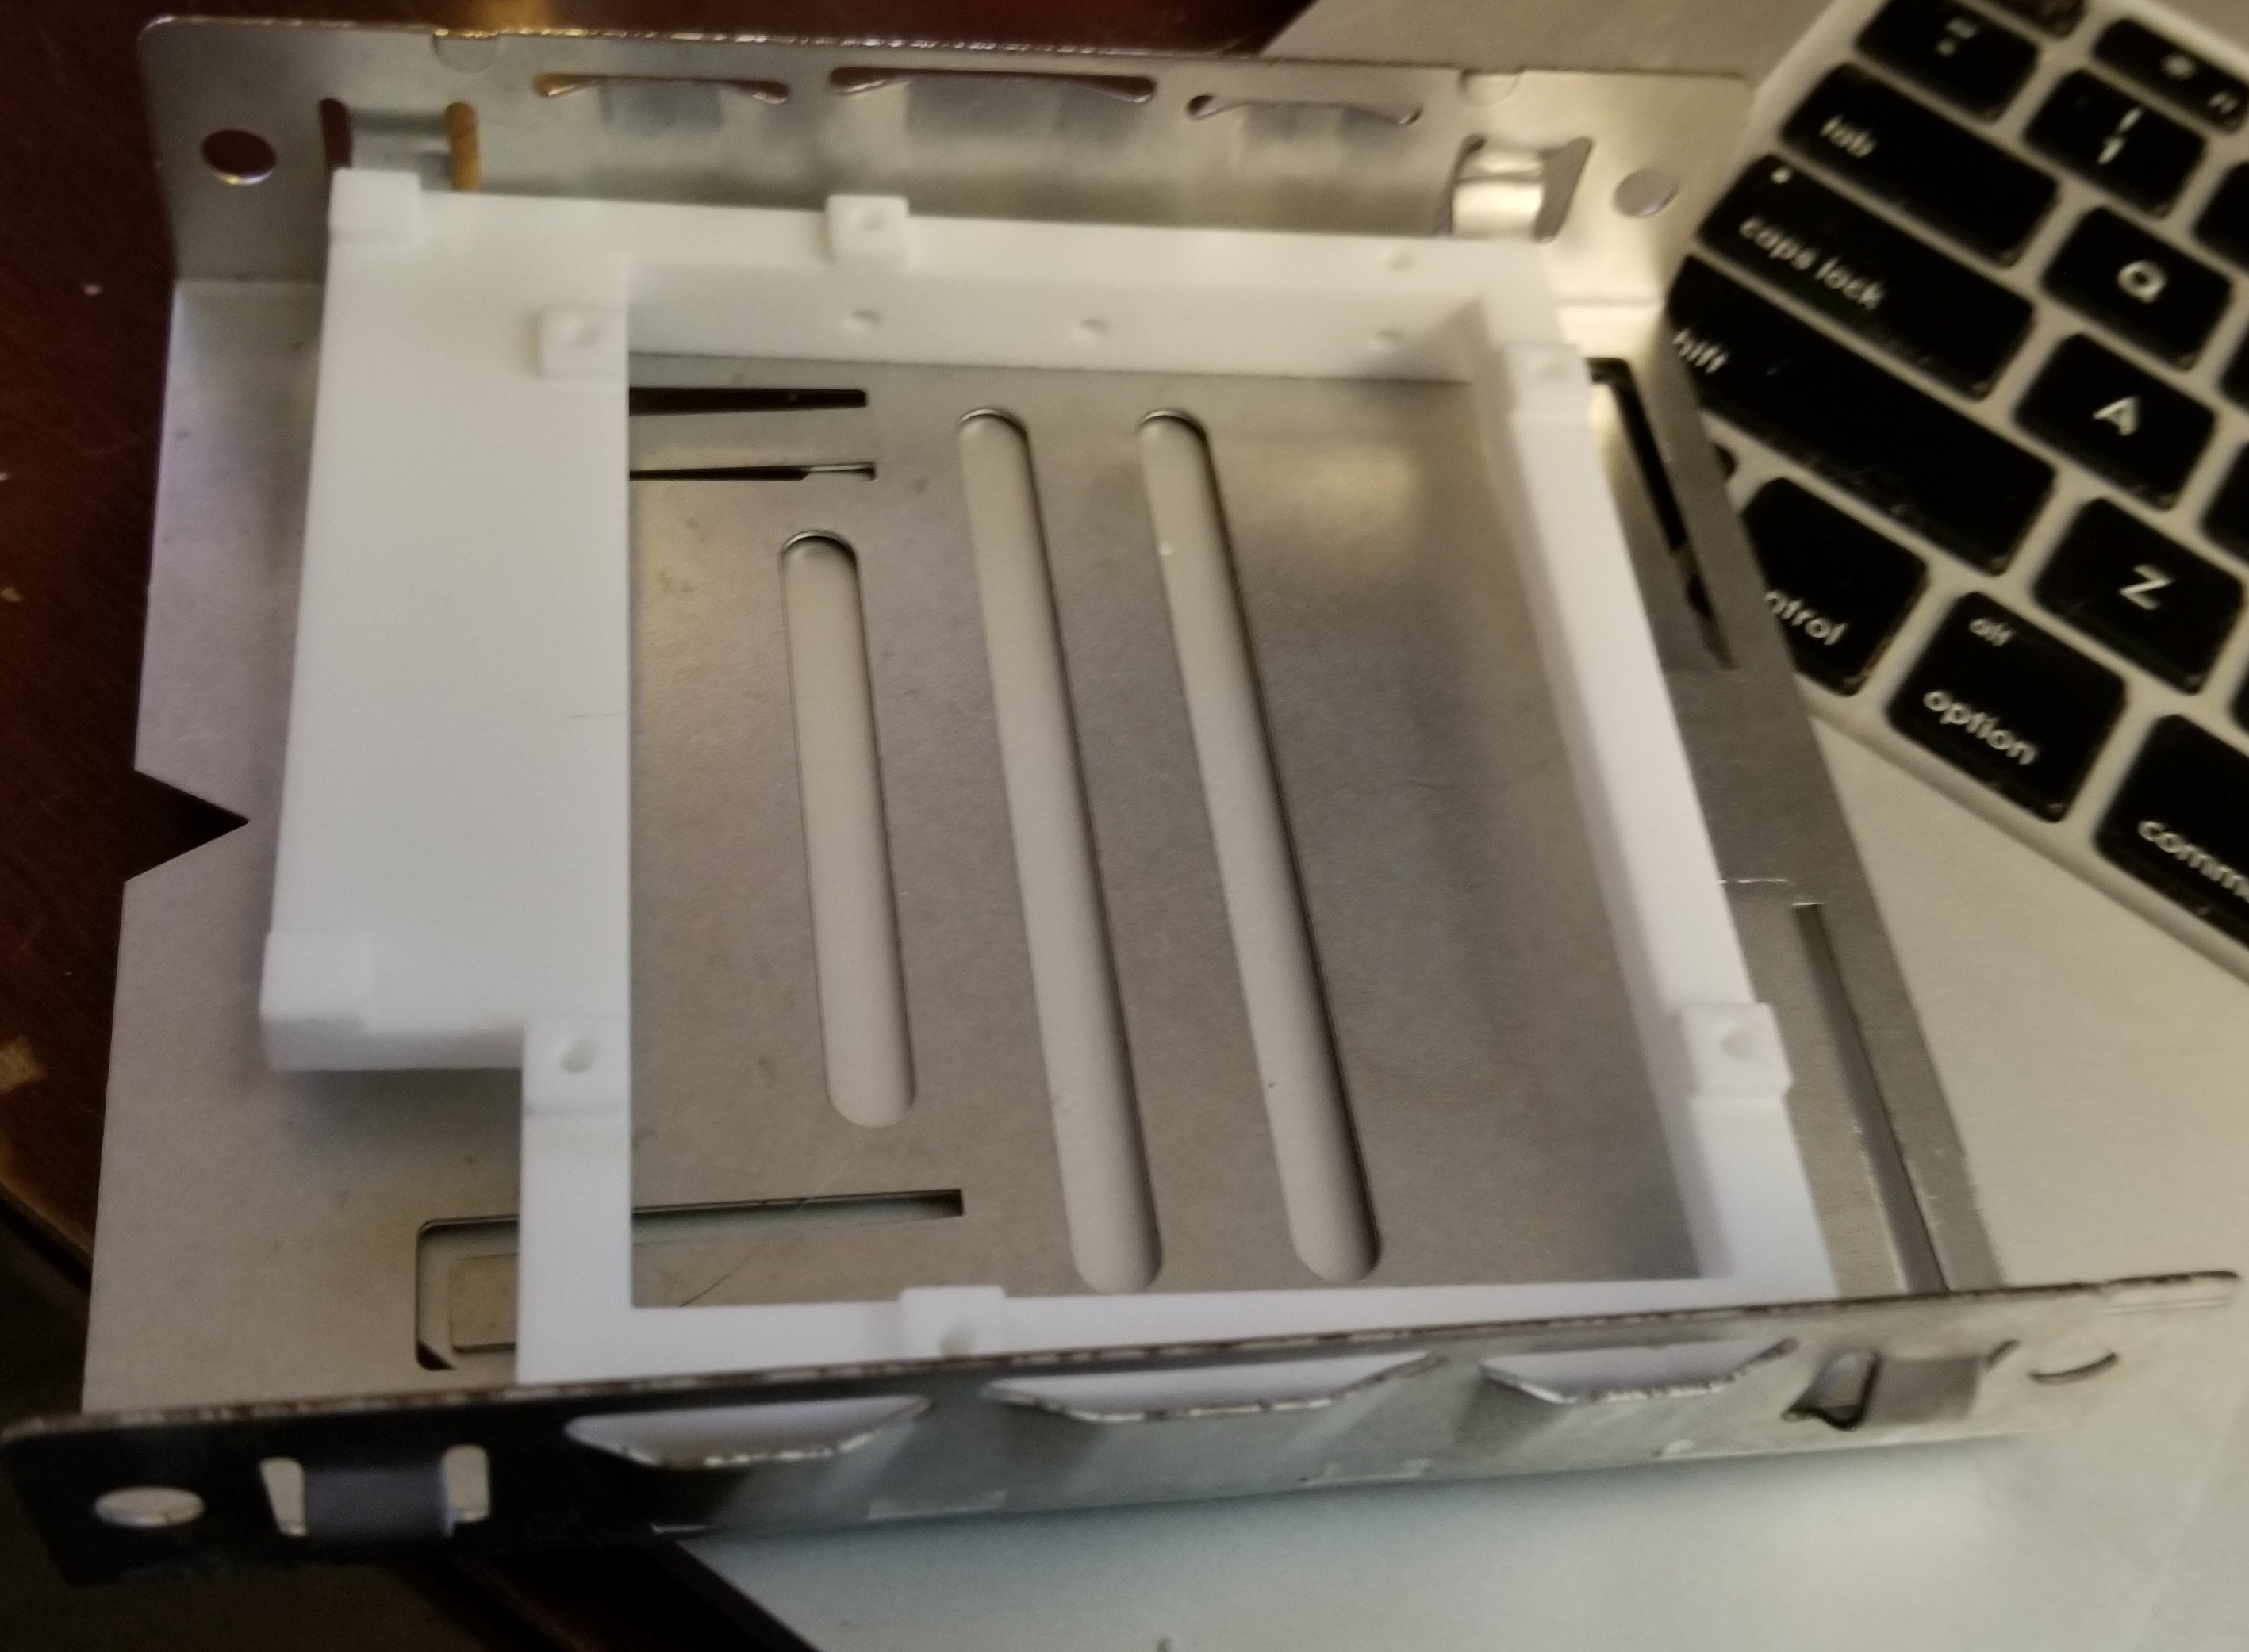
Mount the SCSI2SD with a 3D-Printed mounting bracket
Design Source
The Design for the mounting bracket comes from the 68kmla.org forums.
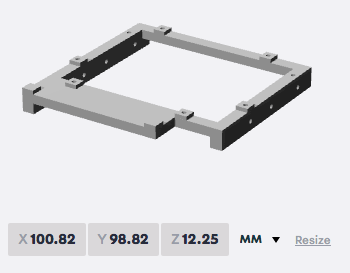
Download the SCSI2SD_Univeral_Mount.zip
Print the STL with Shapeways
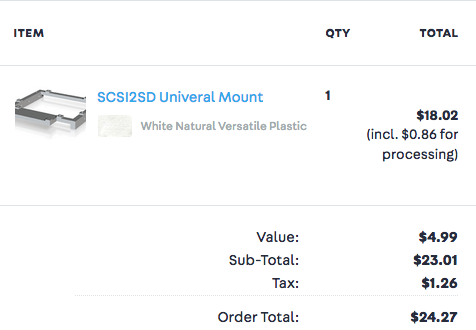
Use 9mm #4 self tapping screws

Mount the SCSI2SD in to the LC mounting tray and insert in to the LC case